How to Take Screenshots on a Laptop or Desktop

Table of Contents
How to Take Screenshots on a Laptop or Desktop Using Windows, macOS, or Linux Device
Introduction
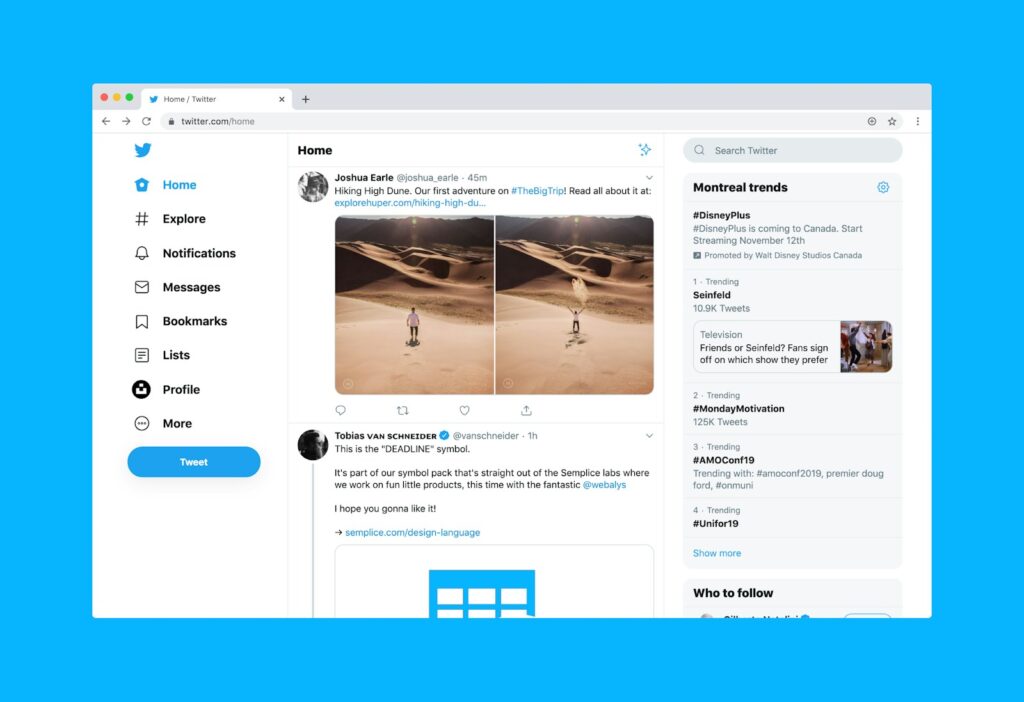
Screenshots have become an integral part of our digital communication toolkit, serving as visual aids for various purposes. This article explores the diverse methods available for capturing screenshots on laptops or desktops, focusing on the three major operating systems: Windows, macOS, and Linux.
Importance of Screenshots
In the contemporary digital landscape, screenshots play a pivotal role in conveying information efficiently. Whether it’s for technical troubleshooting, creative design, or simple communication, a well-captured screenshot can transcend language barriers and provide clarity.
Versatility Across Operating Systems
Understanding how to take screenshots on different operating systems is crucial in today’s multi-platform environment. We’ll delve into the unique methods and tools each system offers, empowering users to navigate seamlessly across Windows, macOS, and Linux.
Overview of Screenshot Methods
Before we explore specific methods, let’s briefly discuss the variety of tools available. From built-in utilities to third-party applications, each approach comes with its own set of features and functionalities, catering to diverse user preferences.
How to Take Screenshots on a Laptop or Desktop
Windows Operating System
Snipping Tool
1. Introduction to Snipping Tool
In the realm of Windows, the Snipping Tool stands as a versatile option for capturing screenshots. Its user-friendly interface allows users to select and capture specific areas of the screen with ease.
2. Capturing Customized Screenshots
Dive into the world of customized screenshots with Snipping Tool. From rectangular snips to free-form captures, this tool provides flexibility in choosing what to capture, enhancing precision.
3. Editing and Annotations
Beyond mere capture, Snipping Tool offers basic editing capabilities. Learn to annotate and highlight essential elements directly on your screenshot, streamlining communication and collaboration.
How to Take Screenshots on a Laptop or Desktop
Snip & Sketch
1. In-built Screenshot Utility
Discover the built-in Snip & Sketch utility, designed for seamless screenshot capturing on Windows. Uncover its integration with the Windows Ink Workspace, opening avenues for creative expression.
2. Annotating and Sharing Features
Explore the annotation and sharing features embedded within Snip & Sketch. From pencil sketches to sharing options, this tool brings an array of functionalities to enhance your screenshot experience.
3. Integration with Windows Ink Workspace
Dive deeper into the integration with Windows Ink Workspace, understanding how Snip & Sketch synergizes with other creative tools, providing a holistic environment for capturing and editing screenshots.
How to Take Screenshots on a Laptop or Desktop
Print Screen (PrtScn) Functionality
1. Basic Screen Capture
Uncover the fundamental Print Screen functionality for quick and straightforward captures. Learn the distinction between capturing the entire screen and specific windows.
2. Clipboard vs. File Saving Options
Navigate the choice between copying screenshots to the clipboard or saving them as files directly. Tailor your approach based on the intended use and convenience.
3. Additional Tips and Tricks
Enhance your Print Screen experience with additional tips and tricks. From capturing pop-up menus to incorporating the Alt key for selective window captures, elevate your screenshot game.
How to Take Screenshots on a Laptop or Desktop
macOS Operating System
Command + Shift + 3
1. Quick Full-Screen Capture
Master the art of quick full-screen captures using the keyboard shortcut Command + Shift + 3. Instantly save screenshots to your desktop for easy access.
2. Automatic File Saving
Explore the seamless file-saving process that accompanies Command + Shift + 3. Uncover how macOS automatically names and organizes your screenshots for efficient retrieval.
3. Screenshot Preview Options
Delve into the screenshot preview options available with this keyboard shortcut, allowing users to make quick edits or share screenshots without opening additional applications.
Command + Shift + 4
1. Selective Area Capture
Refine your screenshot precision by using Command + Shift + 4 to capture specific areas. The crosshair cursor empowers you to tailor your screenshot to the exact dimensions you need.
2. Utilizing Crosshair Cursor
Understand the functionality of the crosshair cursor and how it enhances the selective area capture process. Master the art of precise screenshot composition.
3. Coping with Multiple Screens
Navigate the challenges posed by multiple screens when using Command + Shift + 4. Learn techniques for capturing specific screens or combining them into a single screenshot.
How to Take Screenshots on a Laptop or Desktop
Grab Utility
1. Advanced Screenshot Options
Unlock the advanced screenshot options provided by the Grab utility. From timed captures to choosing specific screen elements, Grab caters to diverse screenshot needs.
2. Timed Captures
Explore the benefits of timed captures and how Grab allows you to set a delay before capturing, providing ample time to set up your screen for the perfect shot.
3. Preferences and Settings
Personalize your Grab experience by exploring its preferences and settings. Customize file formats, cursor inclusion, and other parameters to align with your workflow.
How to Take Screenshots on a Laptop or Desktop
Linux Operating System
Scrot Command
1. Terminal-Based Screenshot Tool
Embark on a journey into the terminal-based world of the Scrot command. Learn the commands for capturing screenshots and customizing the output.
2. Configuring Delayed Captures
Discover the power of delayed captures with Scrot, perfect for setting up complex scenes or capturing dynamic elements on your Linux desktop.
3. Customizing Output Format
Tailor your screenshot output format by understanding Scrot’s customization options. From image formats to naming conventions, take control of your screenshot file structure.
Gnome Screenshot
1. GUI-Based Screenshot Tool
Transition to the graphical user interface with Gnome Screenshot. Explore the user-friendly features and capture options offered by this Linux screenshot tool.
2. Including Mouse Pointer in Shots
Uncover the nuances of including or excluding the mouse pointer in your screenshots. Gnome Screenshot allows users to make this choice based on their specific needs.
3. Utilizing Keyboard Shortcuts
Optimize your screenshot workflow with Gnome Screenshot’s keyboard shortcuts. From capturing the entire screen to specific areas, these shortcuts enhance efficiency.
How to Take Screenshots on a Laptop or Desktop
Shutter Application
1. Feature-Rich Screenshot Software
Dive into the feature-rich environment of the Shutter application. From capturing menus to webpages, Shutter extends the capabilities of Linux screenshot tools.
2. Editing and Annotating Captures
Explore the editing and annotating features within Shutter. Elevate your Linux screenshot game by adding text, arrows, and shapes directly to your captures.
3. Batch Processing Screenshots
Efficiently manage and process multiple screenshots with Shutter’s batch processing capabilities. Save time and streamline your workflow when dealing with large quantities of captures.
How to Take Screenshots on a Laptop or Desktop
Cross-Platform Tools
Lightshot
1. Universal Screenshot Tool
Embrace the universality of Lightshot, a cross-platform screenshot tool compatible with Windows, macOS, and Linux. Discover its simplicity and effectiveness in capturing screens.
2. Instant Editing and Sharing
Experience the immediacy of editing and sharing with Lightshot. Explore its intuitive interface for quick annotations and seamless sharing options.
3. Keyboard Shortcuts for Efficiency
Optimize your workflow with Lightshot’s keyboard shortcuts. From capturing specific areas to copying screenshots directly to the clipboard, efficiency is at your fingertips.
How to Take Screenshots on a Laptop or Desktop
Greenshot
1. Feature-Rich Cross-Platform Screenshot Software
Delve into the feature-rich world of Greenshot, a cross-platform screenshot software catering to the needs of Windows, macOS, and Linux users. Explore its advanced functionalities.
2. Integrating with External Editors
Enhance your editing capabilities by integrating Greenshot with external editors. Seamlessly transfer your screenshots for further refinement and creative enhancements.
3. Managing and Organizing Captures
Master the art of managing and organizing your captures with Greenshot. From customizable file naming conventions to folder organization, streamline your screenshot library.
How to Take Screenshots on a Laptop or Desktop
Troubleshooting and Tips
Common Screenshot Issues
1. File Saving Problems
Address common file-saving issues users may encounter. From file format compatibility to storage space considerations, troubleshoot and optimize your screenshot saving process.
2. Blank Screenshots
Uncover the reasons behind blank screenshots and explore solutions to ensure your captures accurately represent the content on your screen.
3. Clipboard Conflicts
Navigate clipboard conflicts when taking screenshots. Learn how to manage conflicting clipboard data and ensure smooth interactions between screenshots and other copy-paste activities.
How to Take Screenshots on a Laptop or Desktop
Keyboard Shortcuts Quick Reference
1. Windows
Quickly reference essential keyboard shortcuts for screenshot capture on Windows. Memorize the key combinations for efficiency in your daily tasks.
2. macOS
Navigate the macOS keyboard shortcuts for screenshots effortlessly. From full-screen captures to selective area shots, have the quick reference at your fingertips.
3. Linux
Explore the keyboard shortcuts specific to Linux screenshot tools. Customize your workflow with efficient shortcuts for capturing, editing, and managing screenshots.
Conclusion
Recap of Operating System Methods
Recap the diverse methods explored across Windows, macOS, and Linux. Understand the strengths and nuances of each system’s screenshot tools to make informed choices.
Choosing the Right Tool for the Job
Equip yourself with the knowledge to choose the right screenshot tool based on your specific needs. Consider factors such as functionality, user interface, and integration capabilities.
Enhancing Productivity through Screenshot Mastery
As you master the art of taking screenshots on different operating systems, recognize the potential for enhanced productivity. Elevate your communication, troubleshooting, and creative processes through effective screenshot utilization.
Click Here to go to the Microsoft forum site for additional help.
Click Here to go to the Apple support page for additional help.
Click Here to go to the Microsoft forum site for additional help.


